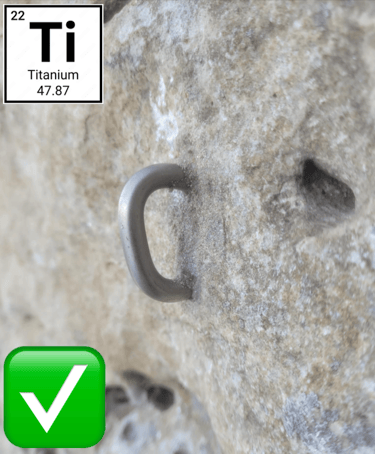
How To Bolt
Disclaimer
Installation of fixed anchors implies a strong responsibility which you should only take if you have suitable experience. The information given here is not to be taken as the be all and end all of bolting facts. This is advice only and the authors are not responsible for inaccuracies, mistakes or accidents caused by using this information. Never blindly assume that any person selling a product (or other climbers, including us) are giving the right advice. Read the product manuals and contact the manufacturer if there are any doubts. Just because you have a background in a trade does not mean you know how to place climbing anchors. All bolts must be able to withstand loads of 25 kN. Make yourself familiar with the EN959 Standard for rock anchors as well as the differences between EN959 and the UIAA 123 Standard. The Safer Cliffs reference we have prepared here will steer you towards the methods and brands that people have been using successfully for years in Australia - it is then up to you to read the technical manuals for the product and follow the instructions exactly. Contact us if you need more info.
Practice At Home
Before placing bolts on a real crag you must practice away from consequences. Learn what can go wrong in a place that will not leave a timebomb for others. It’s not just about learning how to drill - but also judging correct amounts of glue and how to clean it up on rock. Find a disused quarry, lump of stone, or use your garage cement foundation as a test block. Practice rock selection, drilling, notching, placing and removing examples of several types of bolts before moving onto the real world. A world famous crag is not the place to drill your first bolt and splatter the cliff with glue.
Is Bolting Okay?
Got your eye on a new line - or even a whole new crag? Before pulling out the drill, it’s essential to do your due diligence.
1. Understand the Legal and Environmental Context
Australian climbing in the mid-2020s is in a state of flux. Regulatory arrangements vary significantly between states and even between areas within states. What was appropriate ten years ago may no longer be acceptable today.
Before bolting:
Research land ownership and governance. Understand who manages the land - National Parks, Council, private landowners - and consult the relevant Plan of Management (POM). All public lands should have an online-searchable POM.
Check for protected features. Look for endangered flora and fauna, and investigate the presence of Aboriginal cultural heritage (e.g., art, middens, quarries). In NSW, use the Aboriginal Heritage Information Management System (AHIMS) to search for registered sites.
Seek advice. Contact your local climbing access group (e.g., ACAQ, ACANSW) for confidential guidance on sensitive or restricted areas.
Never bolt:
In locations with cultural or ecological significance.
On infrastructure like bridges or dam walls.
2. Evaluate the Climbing Quality and Ethics
Climb extensively in the area first. Understand the style and history of local routes.
Assess aesthetics and impact. A good route should follow a natural, obvious line and should not share holds or crowd adjacent routes. Leave space.
Not everything needs bolts. If a line can be protected with gear, leave it that way. Bolting cracks is highly frowned upon in Australia and may lead to bolts being chopped. Additionally, not all rock makes for good quality climbing. If it's not good, don't bolt it.
Consider the future. Even if a trad line seems too difficult for you now, others may relish the challenge later.
If you’ve:
Been climbing outdoors for less than four years, or
Only climbed in fewer than ten different areas, consider gaining more experience or seeking mentorship before developing routes.
3. Be Mindful of the Consequences
Bolting draws attention. New bolts can attract guidebook entries, which bring climbers - and environmental degradation.
Think about long-term impact. If the area is a peaceful backwater, ask yourself if it should remain that way.
Respect historical climbs. Avoid retrobolting or otherwise infringing on existing routes. Double-check with guidebooks (new and old), online databases (like theCrag.com), and seasoned local climbers to ensure your proposed route is truly new.
4. Use Discretion with Information Sharing
Avoid social media bragging. Posting about bolting exploits can lead to fines, confiscated gear, or worse. Land managers monitor online content.
Be cautious with guidebook entries. Even platforms like theCrag.com have been used against climbers in access negotiations.


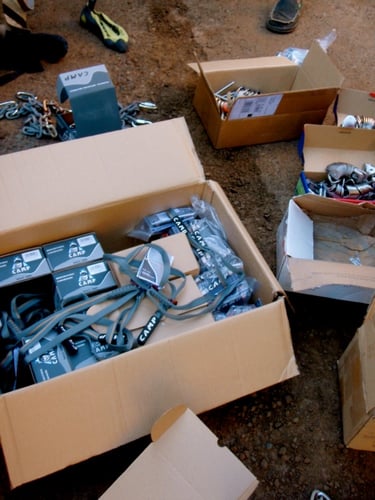
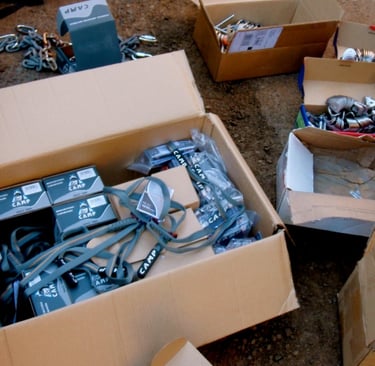
Tools
Drill
Batteries
Hammer
Rubber hammer for glue-in bolts
Injection gun
Long flathead screwdriver (cleaning)
Hole blower
Hole cleaning brush
Scrubbing brush
Pliers
Sometimes useful
Impact driver
Battery blower
Battery grinder
Gear
Rope protector(s)
Static rope 10-11mm
Helmet
Harness (thick and padded)
Gloves
Safety glasses
Ear plugs
P2 dust mask
Adjustable daisies
Skyhook(s)
Gri-Gri
Trad gear
Harness
Chalk
Slings
Prussics
Biners
Ascender
Consumables
Clothes that will end up gluey
Drill bits
Rags
Glue
Nozzles
Dust/sand in squeeze bottle
Bolts/hangers/anchors
Concrete screws or removable bolts
Pins (loose soft rock)
Ziplock bags
Tape
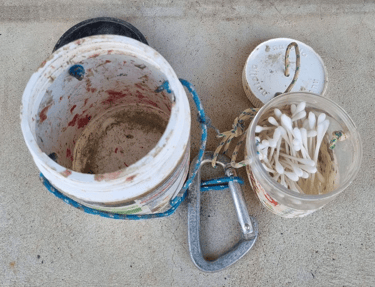
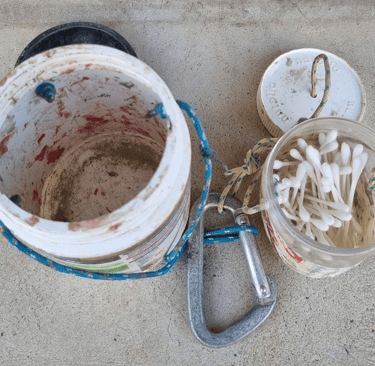
Cotton tips (glue detailing)
Screw top plastic jars to carry new and waste cotton tips
Bag(s) to carry all this stuff on your harness
Route Preparation
Safety and General Considerations
Understand the risks: Climbing gear is designed for climbing, not repeated abrasion from rap-bolting or scrubbing. Deaths have occured while scrubbing routes (repeated rope abrasion).
Pad all edges that ropes may contact during brushing to prevent abrasion damage.
Use rebelay techniques as needed while descending (clove hitch the odd placement as you descend to prevent rope rubbing).
Practice aid climbing techniques for steep routes; it helps with bolting.
Always wear a helmet: Rockfall and falling gear are common on new routes.
If the route isn't good: Be prepared to walk away. The more work you have to do on a route to "make it good", you really need to question the end result. Discretion is the better part of valour.
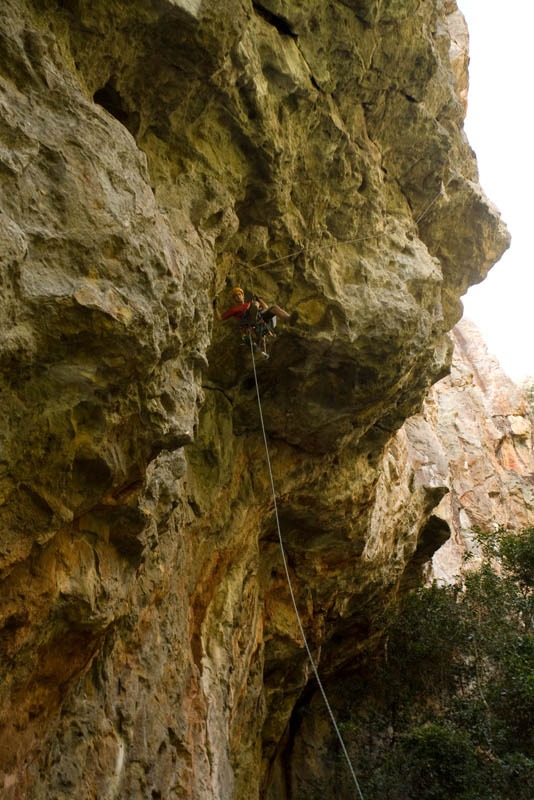
Initial Cleaning and Descent
Abseil down the route and remove loose rock using a hammer and small crowbar.
Bring a rack of natural gear to maintain proximity to the wall.
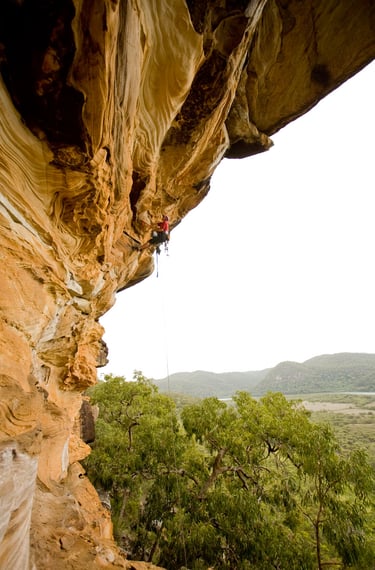
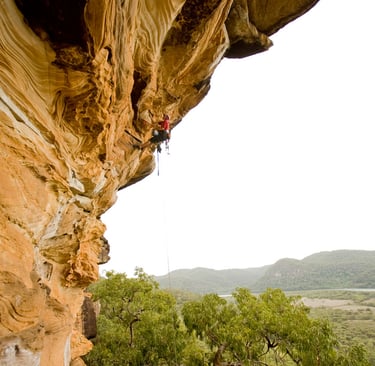
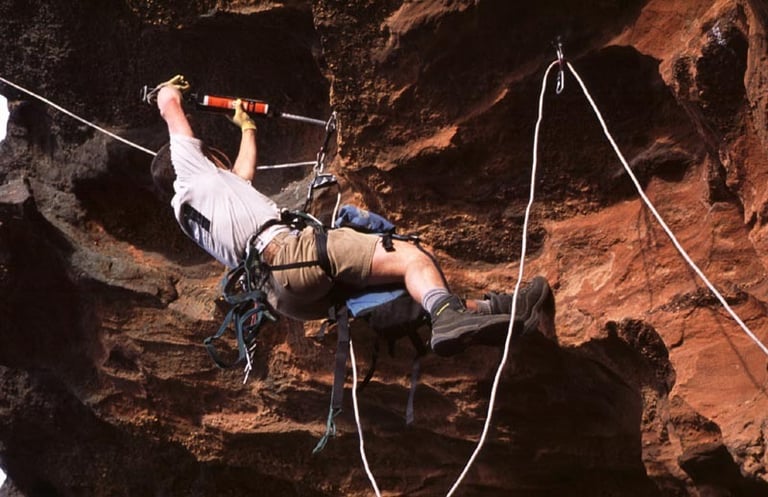
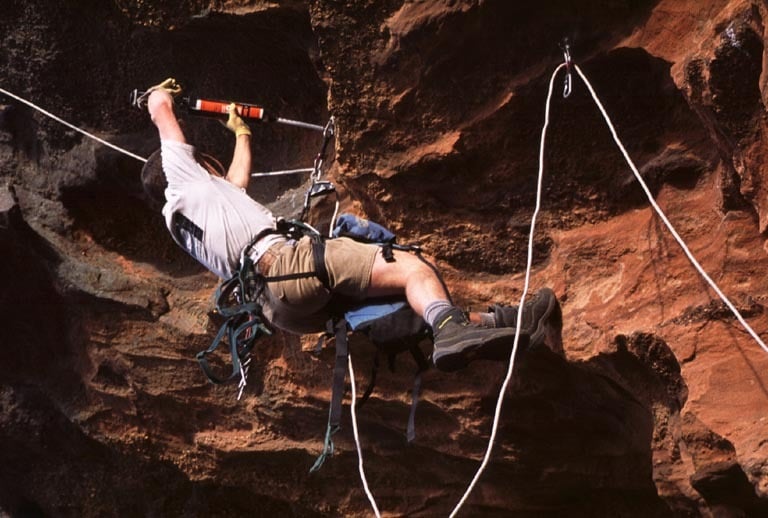
For overhung terrain:
Use natural placements and skyhooks.
Utilise an adjustable daisy chain with a hook for positioning.
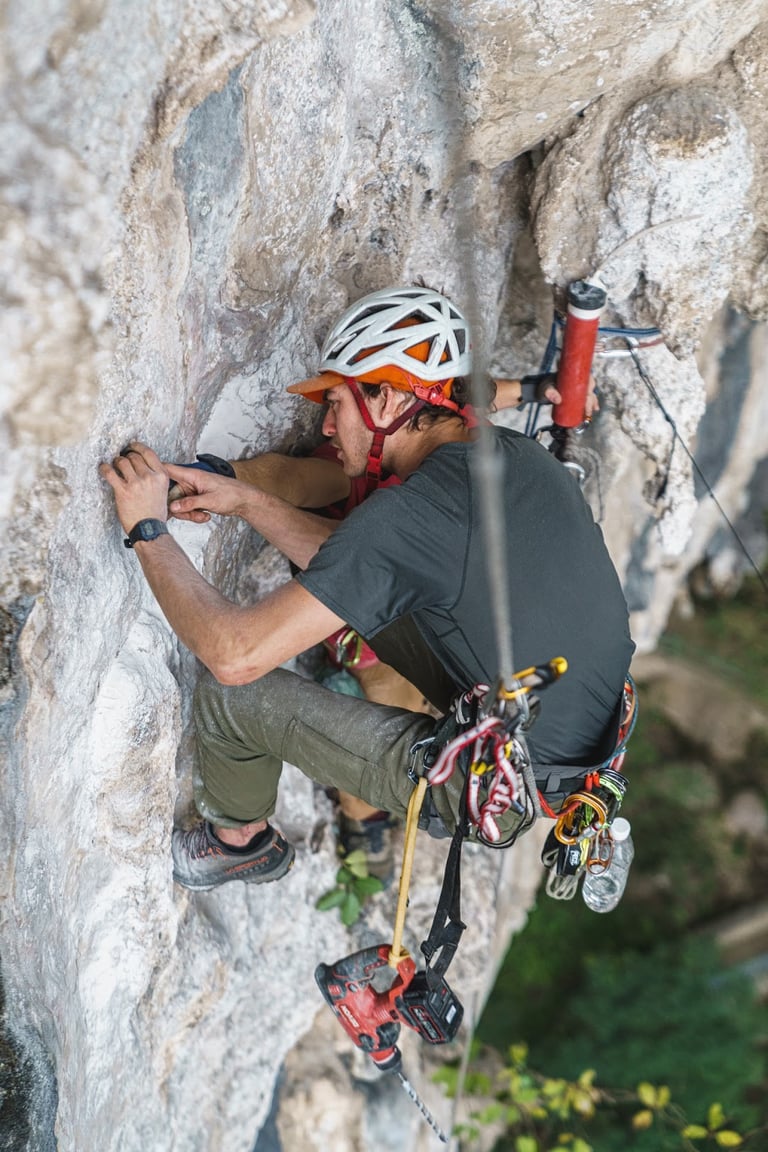
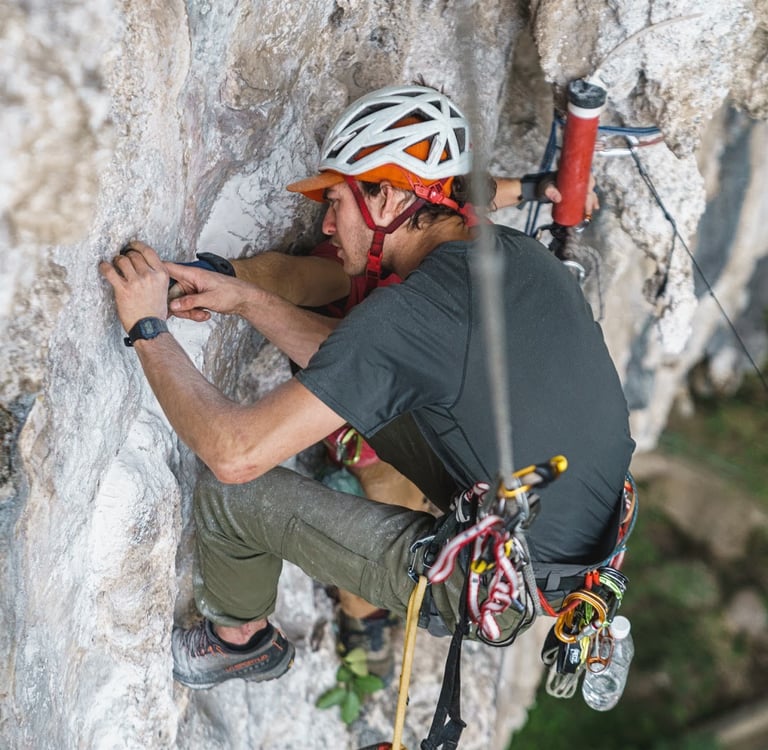
Use temporary bolts as appropriate:
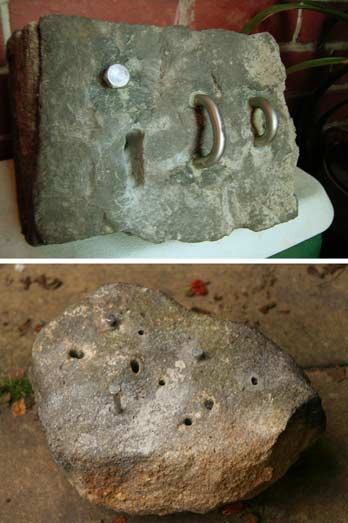
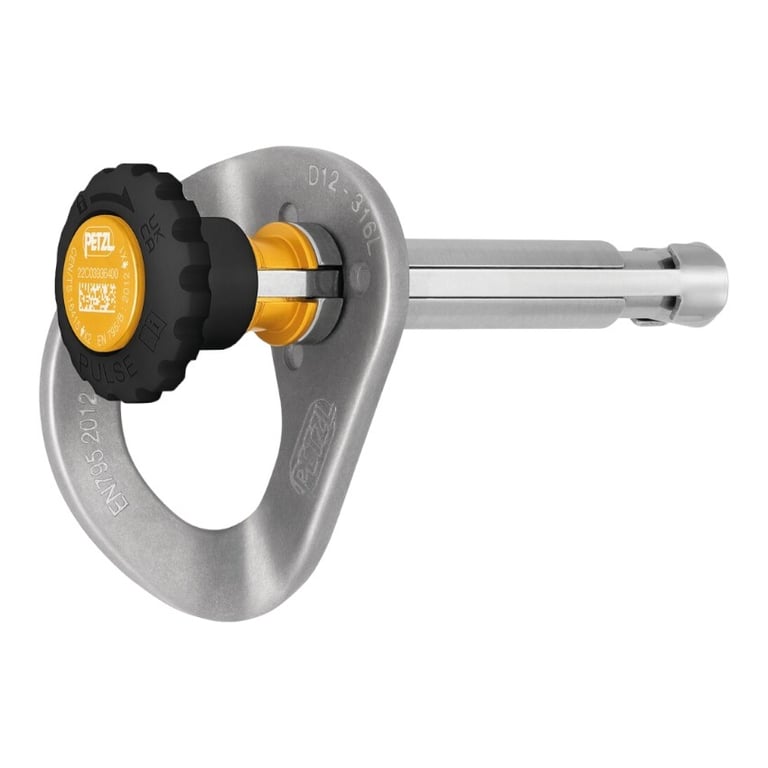
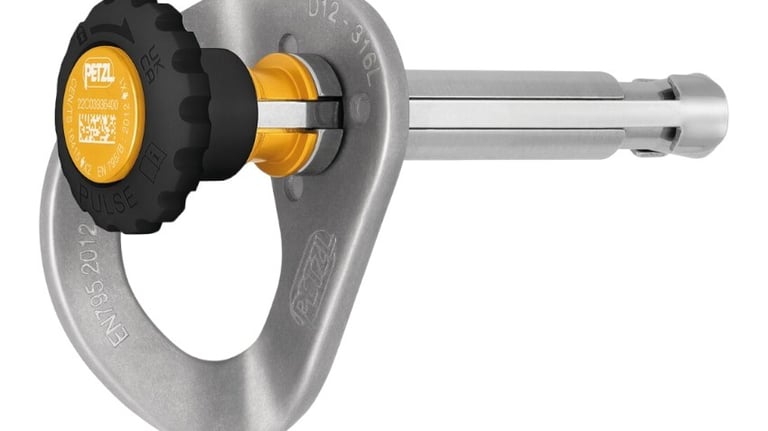
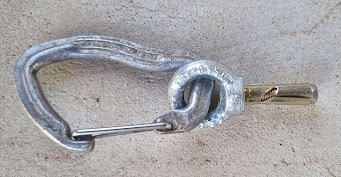
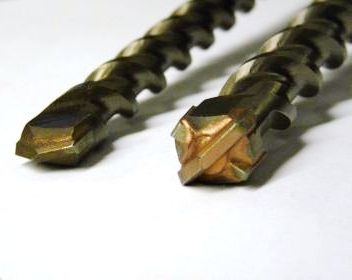
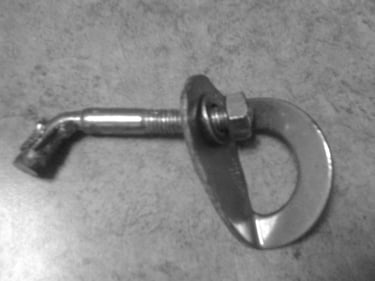
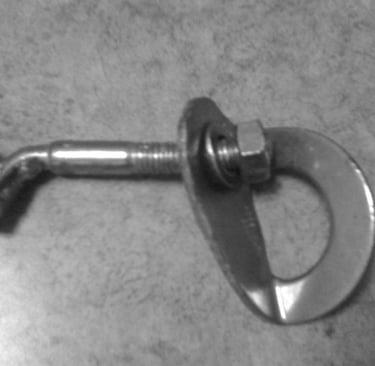
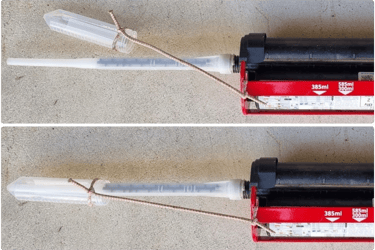
In hard rock: Petzl Coeur Pulse removable bolts ($$$). A budget option (pictured) is 10mm x 40mm dynabolt with rigging eye nut
In soft rock: 8mm concrete screws (holes can be reused or patched later).
If local ethics allow, reinforce key loose holds with glue.
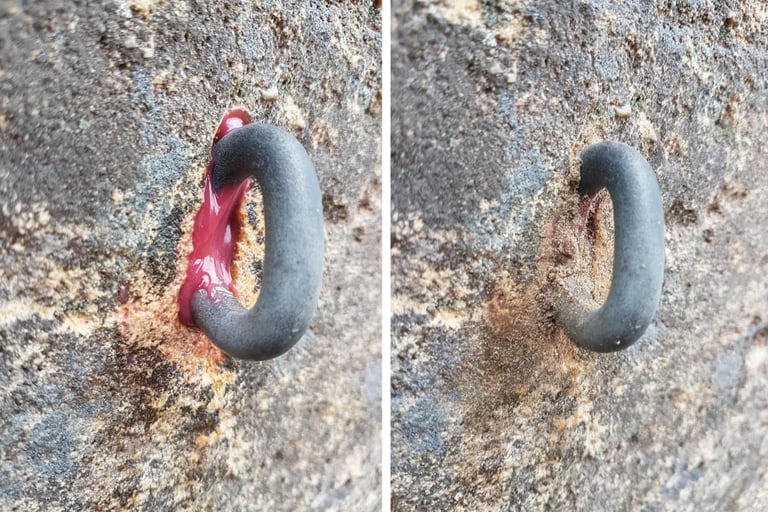
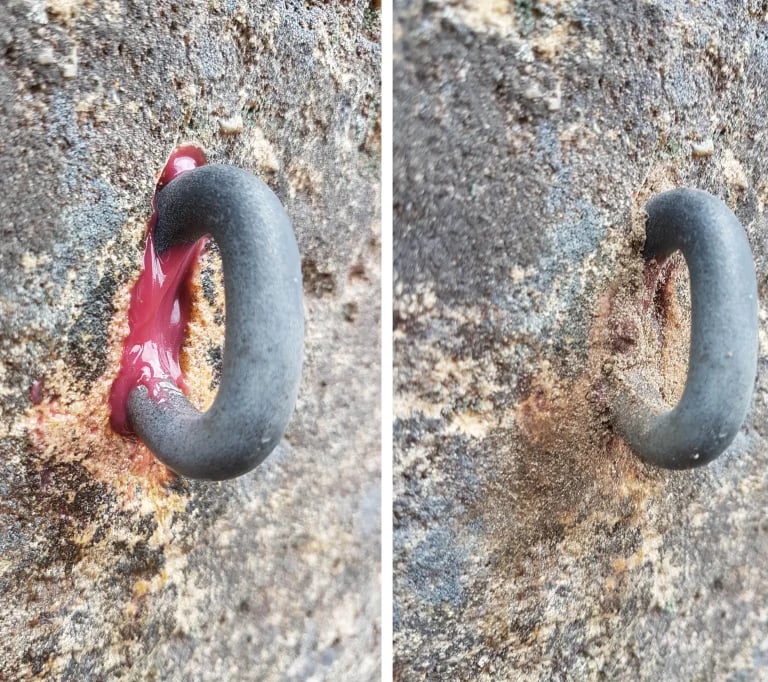
In soft rock, always pin loose holds - glue alone will eventually fail (see pic).
Route Testing
Top-rope the route first if possible, or rehearse sections hanging on the rope:
Find optimal clipping stances and usable holds.
Improve bolt placement decisions by climbing before drilling.
Bolt Placement Planning
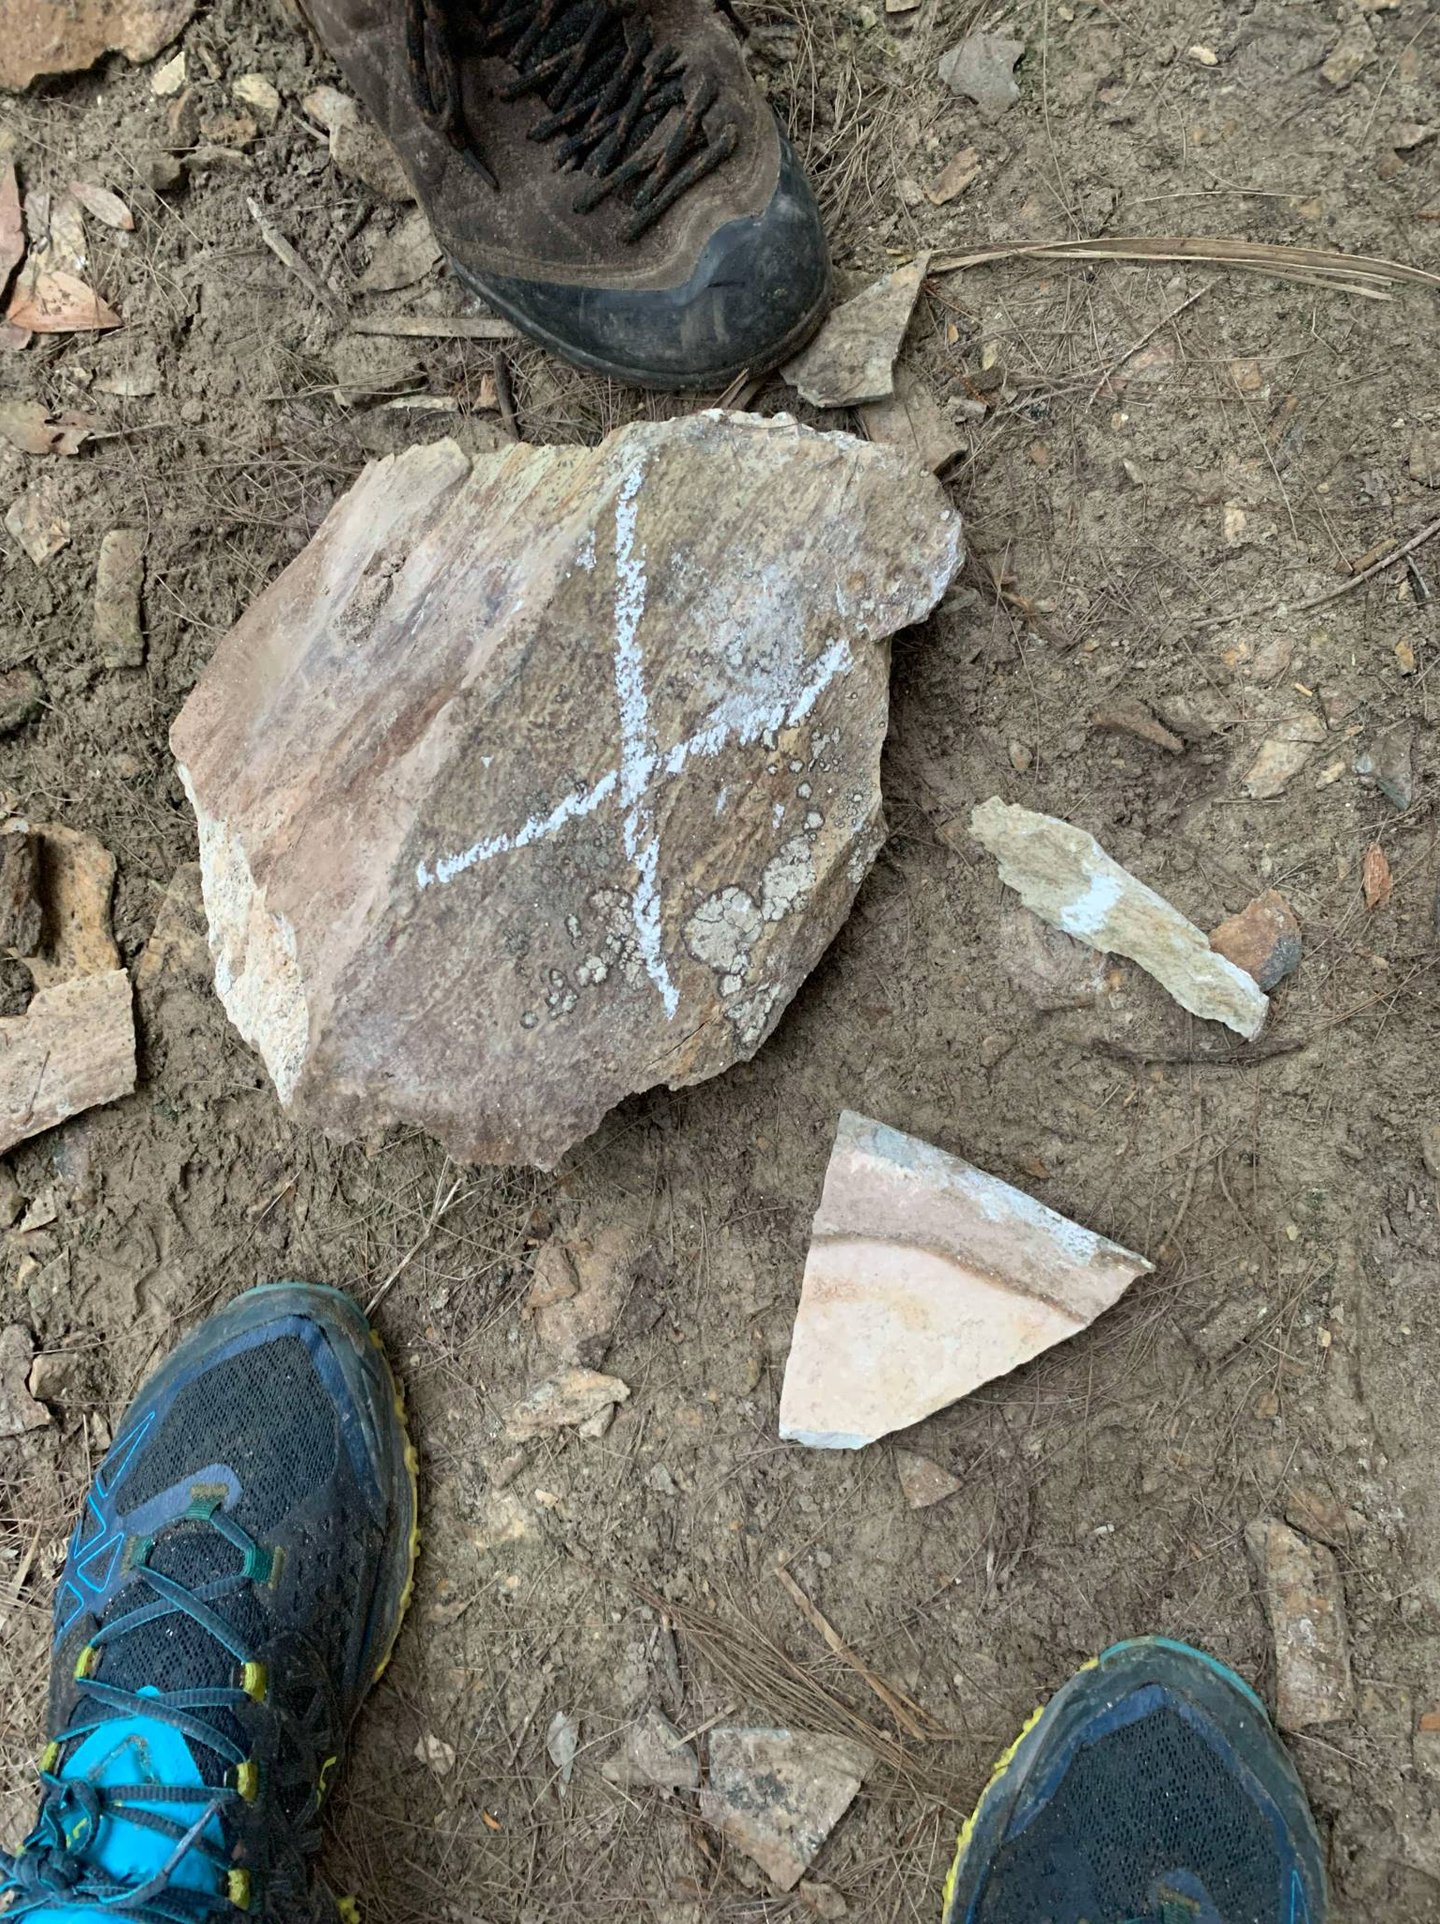
Mark bolt locations using chalk arcs to guide placements:
Ensure clipping is reachable for shorter climbers.
Use arcs, not X's. X's fixate you on drilling in one place. An arc keeps you evaluating all potential reachable positions in context with bolts above and below.
Be gentle with chalk, these can be hard to clean off when you're done.
Pay special attention to the first 10 metres, which are the most dangerous:
Avoid placements that could result in a ground fall when clipping the second bolt.
Euro method: Place bolt 1 roughly 2.8m up, bolt 2 about 1.2m further up, and the bolt 3 about 2m above the second.
Alternatively: Consider placing the first bolt higher than normal to encourage cautious climbing or stick-clipping, but always ensure the second is not too far from the first.
Avoid placing bolts directly under bulges, or at the back of a roof - this creates drag and potential for rope damage.
Anchor and Descent Planning
Decide if a lower-off anchor is needed:
Required if top-out is loose, vegetated, has poor walk-off, or route is very steep.
Follow local precedent if lower-offs are already used at the crag.
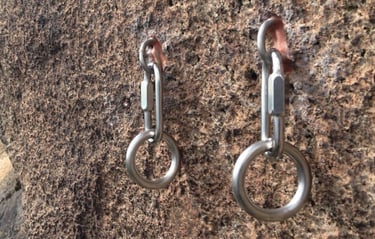
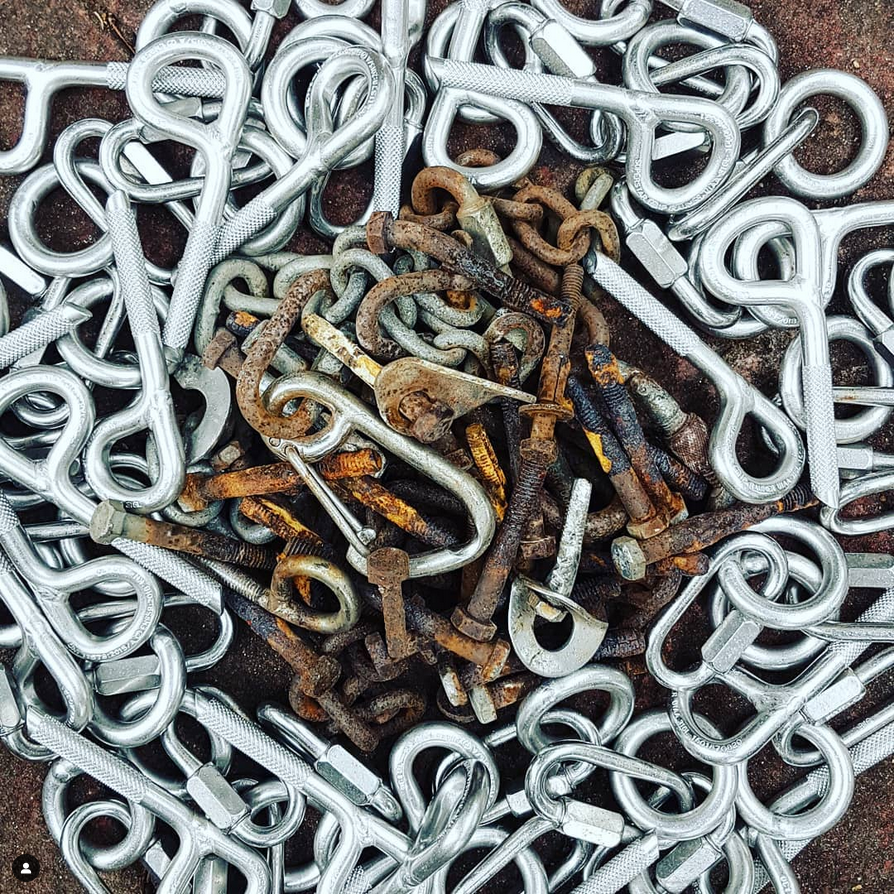
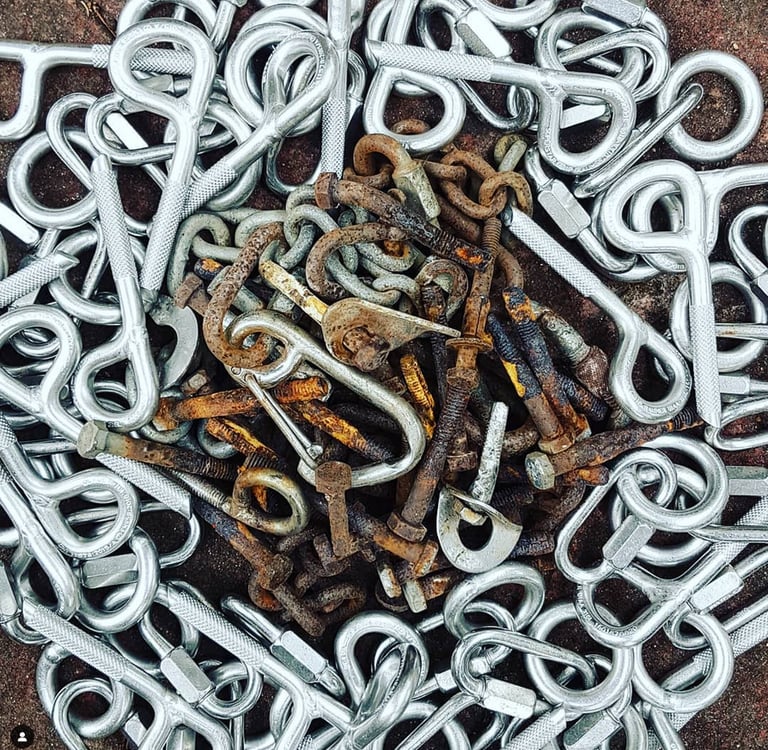
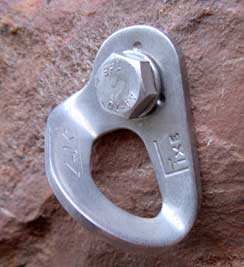
Choose replaceable wear points for lower-offs:
Example: spinning rings attached with mallions (see pic).
Don't place lower-off's beyond an edge or ledge that will cause rope to rub across the rock. Try to always have the rope running freely from the anchor back down the route.
Hardware Selection
Select bolt type based on:
Rock hardness
Current best practices
Do not base hardware choice on cost - opt for high-quality gear to reduce future maintenance.
Refer to our bolt type guide for the most suitable options.
Glued holds will eventually fail if they are not also pinned.
10mm x 40mm dynabolt with rigging eye nut (hard rock only, temporary)
Petzl Coeur Pulse removable bolt
(hard rock only, temporary)

Drilling
Positioning
Use a Gri-Gri and two adjustable daisy chains for body support when working with sky-hooks or natural gear.
Tap the rock with a hammer to find solid, sound rock.
Ensure bolt placement is at least 300mm away from any fault line, crack, or rock edge.
Visually assess rope line to reduce rope drag:
Continually look up and down the route.
Try to split the difference between the lateral positions of the bolt above and below to avoid zig-zag patterns.
Test placement with a quickdraw:
Ensure the carabiners won’t press against an edge or have a gate forced open.
How will the rope run?
Drilling
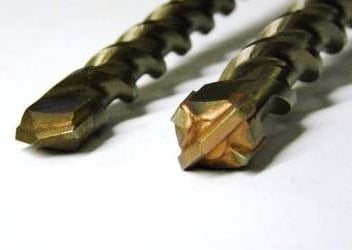
Drill bit choice:
Hard rock: In our testing, 2-cutter style bits (as opposed to 4-cutter) seem to work better in hard rock as the impact force is concentrated over a smaller area. YMMV.
Soft rock: In soft rock, drilling efficiency is limited by clearance rate (getting the dust out of the hole) so choose a bit with deep flutes. We prefer 2-cutter bits in soft rock.
Mark drill bit with tape to indicate desired hole depth.
For expansion bolts, drill 15mm deeper than bolt length to allow for future removal or recessing.
For some ringbolt brands, a slightly down-sloping hole (pic) can:
Help with optimal ring basket positioning.
Prevent biner-bind from over-recessing.
For U-bolts, a spare bit placed in the first hole of a U-bolt can be used as a guide to keep the drill parallel for the second hole.
Begin drilling slowly to:
Ensure a straight hole perpendicular to the rock.
Avoid fracturing the hole edges.
Once aligned, increase drill speed to maximum.
In hard rock, take care to avoid overheating the drill bit as this can destroy the carbide tip. Cycle between bits if necessary to allow for cooling time.
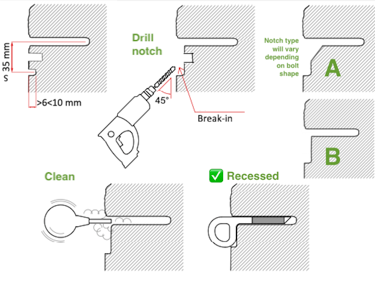
Recessing Ringbolts
Leaving a glue-in unrecessed (eye flush on the surface) creates a lever arm that increases flexing. Manufacturers recommend recessing (countersinking) to reduce this leverage.
Recessing is easy in soft rock and more difficult in very hard rock. You may need additional tools, such as a chisel.
Different ringbolt shapes require different notch shapes. The following are generic instructions, adjust as needed.
Drill a 10mm deep, parallel hole located 35mm below the main bolt hole.
Drill a 20mm deep, parallel hole between these two holes.
Drill upwards at a steep angle starting in the bottom hole, breaking into the middle hole and then the main hole to remove the rock and create a notch.
Test fit the ringbolt in the recessed notch to ensure proper alignment.
Cleaning the Hole
⚠️ Do not blow dust by mouth - silica dust is a known carcinogen.
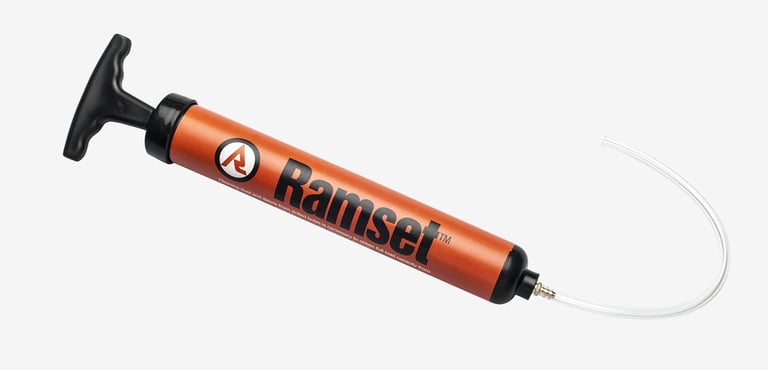
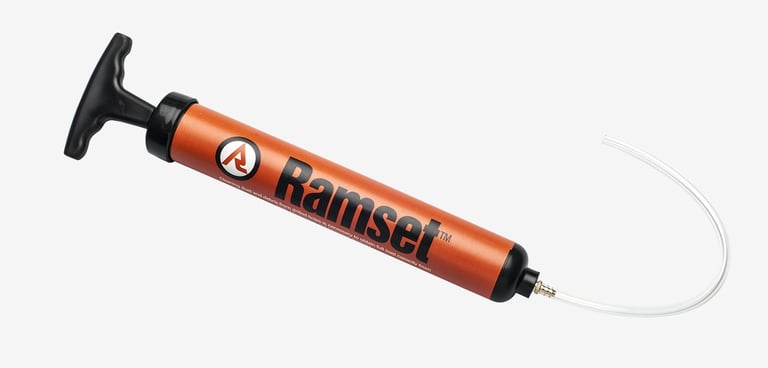
Use a blower pump to remove dust from the hole.
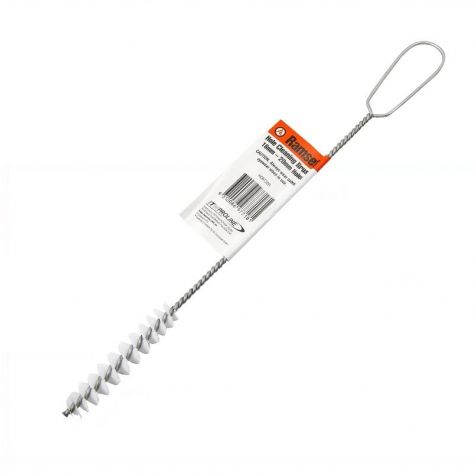
Use a plastic hole-cleaning brush to scrub out dust.
Repeat blowing and brushing until the hole is completely clean (1–2 minutes per hole).
Final Cleanup
Remove visible dust from the rock face, especially under roofs where rain won't wash.
Use a battery-powered blower to eliminate white stains that draw attention.
Bolt Installation
Glue-In Bolts
Preparation
Clean bolts before use:
Wash with hot water and detergent or acetone to remove machine oil.
Wear protective gear:
Old clothes
Nitrile gloves (flexible type)
Face mask (for prolonged gluing)
Bring essential items:
Rags
‘Spoodge’ ziplock bag(s) for glue waste
Extra nozzles
Old rope (to avoid glue contamination)
Clear gear from under the route to avoid glue damage.
Glue Handling
Be aware of skin hazards:
Epoxy on skin can cause blistering and allergic reactions.
Use only high-quality epoxy glue (see our glue guide for options).
Check temperature conditions for glue:
Generally, do not glue below 5°C or above 38°C.
Read manufacturer specifications for temperature tolerances and working times
Advanced techniques: use heat or cold packs to keep glue tubes happy
Purge 3+ trigger pulls of glue into a ziplock bag before starting:
Check glue is uniform in color and consistency.
Visually confirm both components are being mixed properly.
Keep ziplocked glue and check it after the curing period to confirm curing.
A short plastic tube with a bungy cord makes a great nozzle sheath - avoids getting glue all over the rope / rock / legs while moving between placements.
Injecting the Glue
Clean holes thoroughly before gluing:
Alternate between brushing and blowing.
Clean for 1–2 minutes per hole until spotless.
Determine number of trigger pulls required per bolt (usually 1–2).
Apply glue starting at the back of the hole, slowly pulling out to avoid air pockets.
Bolt Insertion
Wipe glue from nozzle and smear it on the bolt shaft for better bonding.
Insert bolt slowly while spinning to eliminate air pockets.
Push firmly to the back of the hole until glue flows out.
If glue doesn't come out, remove the bolt and inject more glue.
Remove excess glue immediately once it starts to flow from the hole with cotton rag, otherwise it may run down the rock or fall to the ground.
If bolts have an interference fit, avoid hammering them in with a regular carbon steel hammer as this can introduce impurities that lead to corrosion. Instead, use a suitable non-ferrous barrier between the hammer and the bolt, or use a stainless hammer, coated hammer, or rubber mallet.
Ensure ring notch is fully filled with glue, then detail the glue surface using a cotton-tip. (A couple of small screw top plastic jars are handy to carry new and waste cotton tips for glue clean detailing)
Do not smear glue outside the bolt area unnecessarily.
For colour mismatches, camouflage the glue using dust/sand (see our camo guide)
Placements in Roofs or Steep Overhangs
For placements in roofs:
Wedge a small stick in the side of the hole to support the bolt while drying. For the neatest visual result, use a sharp chisel or blade to flush this off after drying. Snapping with fingers often leaves an unsightly stub.
Preference U-bolts in these positions (or any other type of bolt that has a friction-fit component e.g. twisted leg bolts, or Titan Eterna's) as they hold themselves in place.
After Placement
Allow glue to cure for the full recommended period (typically overnight).
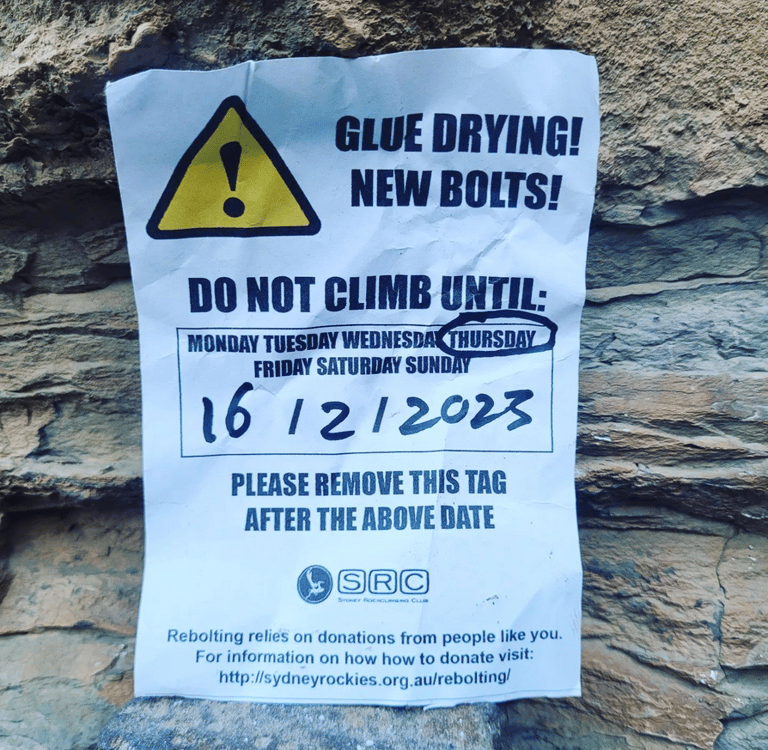
Post a warning notice at the first bolt in high-traffic areas.
Check the ziplocked glue to ensure it cured as expected.
Test each bolt before use:
Load in shear (down) and tension (out) with body weight.
Jab glue to confirm it's rock solid.
If not solid: extract immediately by drilling beside shaft and dislodging. Never leave a dodgy bolt in place. Tag it out of action by wrapping in tape so it cannot be used before extraction.


Patched hole on left, and on right a new expansion bolt placed by someone who did not know how to correctly align the fixed hanger. Placing vertically like this is not correct. See below for correct orientation.
Using a worn drill bit in very hard rock produces an undersized hole and big problems for expansion bolts

Expansion Bolts
Installation Process
Align the bolt perfectly before hammering in.
If hard hammering is required, stop immediately:
Remove the bolt and re-drill the hole to correct size.
Avoid undersized holes by using sharp, unworn drill bits.
Hanger Alignment
Align fixed hangers correctly.
They require an angle, and are not placed vertically.
Torque Settings
Use a torque wrench to apply correct tension.
If unavailable at the crag, practice at home on similar rock.
Match torque to bolt size and manufacturer specs:
12mm Ramset anchors need twice the torque of 10mm versions.
Fit & Adjustment
If bolt does not sit flush, remove and re-drill hole.
Use needle-nose pliers to remove the sleeve.
To extract the cone, screw bolt in without sleeve and pull it out.
Final Testing
Test bolt integrity by:
Clipping into a chain of quickdraws
Jumping and shifting weight side-to-side
Watch for hangers rotating or unscrewing:
On routes with lateral fall potential, use glue-in ringbolts or U-bolts instead.
Fixing Mistakes
Use epoxy putty (e.g. Selly’s Knead-It) to fill bad holes:
Apply like Blu-Tac
Camouflage with natural-colored dirt or sand
Keep some putty in your kit for repairs
SAFER CLIFFS AUSTRALIA
Helping Keep Australian Climbers Safe
DONATE
Visit your State's page to donate and keep us moving
© 2026. All rights reserved.